1. The Linux command line
1.1. Why Linux?
Linux is an operating system, the set of system software that manages computer hardware and software. You’ll be familiar with other common operating systems, such as Windows, macOS, and Android.
In this tutorial we’ll refer to Linux throughout, but be aware that Linux is an offshoot of the UNIX operating system. For our purposes, we can consider the two terms interchangeable.
There are lots of very good reasons to use a Linux operating system. For the purposes of geospatial data processing the main reasons are:
1. It’s open-source
Linux is free to use and open-source. You own it 100%, and you are not beholden to a commercial company.
2. It’s great for science
Linux hosts a large ecosystem of high-quality open-source tools, many of which are equal to or better than commercial alternatives. In this tutorial we’ll look at GDAL, an unrivalled library for processing geospatial data which is freely available on Linux systems.
3. Distributed and large-scale computing
Linux systems are particularly suitable for tasks involving the processing of large volumes of data.
You may be used to processing data on a local desktop machine, and know the limitations of this. Linux allows multiple users to share a single powerful machine, or a single user to operate multiple smaller machines. It’s very common for a Linux user to be actually operating a computer in a different location. For example, files may be stored on a remote server and processing run at the same location as the data. This machine can easily be on another continent operating as a ‘cloud platform’. This paradigm means that some operations that are limiting in remote sensing (e.g. data download and storage) become less of an issue.
4. It’s easy to use
Seriously, it is! Linux does come with a steep learning curve, but once you get used to it, it really will improve your efficiency. For flexibility and large-scale processing tasks it’s hard to beat.
1.2. The Linux terminal
There are many different distributions of Linux, most of which come with a graphical user interface (GUI). Whilst most of the operations we’ll cover here can be performed using the GUI, Linux is at its most powerful when operated though the command line.
First we’ll open up a new terminal window.
How to open the terminal depends on your Linux distribution. You’ll usually find the terminal at Applications -> System Tools -> Terminal. Or, right click the Desktop and there is usually a shortcut to open a terminal window.
The terminal window will look something like this:
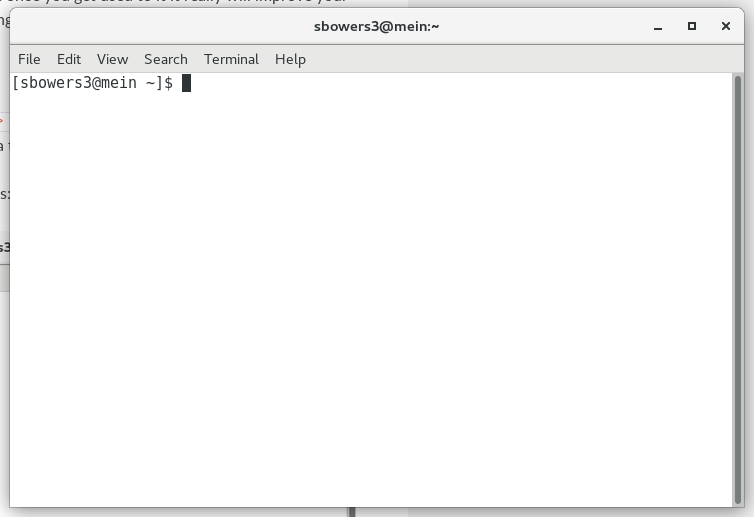
The terminal shows your username (in my case, sbowers3), the name of the computer you’re connected to (mein), the directory you’re in (~) and has a space for you to type commands (□).
Let’s try to run a basic a command. Type echo Hello World! into ther terminal, and hit return to execute it:
[username@linuxpc ~] echo Hello World!
Hello World!
The echo command is very simple, it prints text to the terminal. Get used to typing commands into the terminal using the echo command.
1.3. Navigation
1.3.1. Where am I?
The Linux file system is based on a series of directories. In Windows, these are called ‘folders’.
You can get the find out where you are with the pwd (print working directory) command:
[username@linuxpc ~] pwd
/home/username
On most systems when you open a new terminal window you’ll be located in your home directory. The home directory is located at /home/username, which can also be reached with the shortcut ~. The home space is the part of the system that you have control over, and is the default location for file storage.
The root of the directory system is /, with each subsequent / separating directory names.
1.3.2. What’s here?
The command ls (list) will tell you what files and directories are in the working directory:
[username@linuxpc ~] ls
Desktop
Documents
Downloads
...
To show more details about the contents of the working directory, you can use the -lh (long, human readable) flags:
[username@linuxpc ~] ls -l
drwxr-xr-x  4 username username 4.0K Sep  7 11:32 Desktop
drwxr-xr-x 12 username username 4.0K Sep 12 11:35 Documents
drwxr-xr-x  9 username username  12K Sep 13 13:14 Downloads
...
This additionally gives you infomrmation the about file permissions (e.g. drwxr-xr-x), file ownder (username), the file size (e.g. 4.0K), modification date and time (e.g. Sep 12 11:35).
It’s worth taking a little time to understand file permissions. This string is split into four sections:
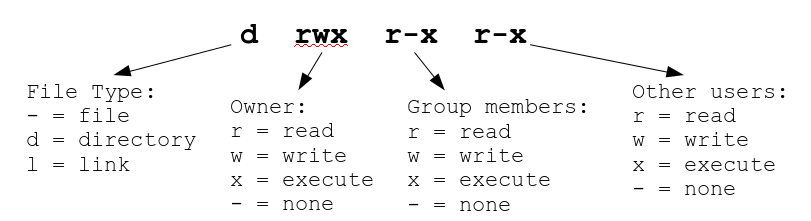
The first character gives the file type, and the remaining nine characters the read, write and execute permissions for the owner, group members and others users.
1.3.3. Moving around
You can move into other directories of the system with the cd (change directory) command:
[username@linuxpc ~] cd Documents
[username@linuxpc Documents] pwd
/home/username/Documents
You can move back up the directory tree with ..:
[username@linuxpc Documents] cd ..
[username@linuxpc ~] pwd
/home/username
Similarly, you can move two steps up the directory tree with ../..:
[username@linuxpc ~] cd ../..
[username@linuxpc /] pwd
/
With the above commands we’ve been using ‘relative’ file paths. They refer to a location that relative to the present working directory. We can also use absolute pathnames which do not take account of the working directory. Absolute paths always start from the root // directory, for example:
[username@linuxpc ~] cd /home/username/Documents
You can move back to the home directory with the shortcut '~':
[username@linuxpc /] cd ~
[username@linuxpc ~] pwd
/home/username
1.3.4. Exercises

What happens when you run the command
cd .? What location do you think that.refers to?Who has permission to read and write file with the following permissions:
-rwx-------rwxr--r---rwxrwxrwx
Are the following relative or absolute paths?
Documents/DATA//home/username/~/Documents
1.4. Making and moving files
1.4.1. Manipulating files
First, we’ll make a test file to play with using the command touch:
[username@linuxpc ~] cd ~
[username@linuxpc ~] touch file1
[username@linuxpc ~] ls
...
file1
...
We can also make a new directory using the command mkdir (make directory):
[username@linuxpc ~] mkdir directory1
[username@linuxpc ~] ls
...
directory1
file1
...
We can move our file into the directory using the mv command:
[username@linuxpc ~] mv file1 directory1
Change directory to directory1 and verify that file1 is there.
We can use the cp command to copy a file:
[username@linuxpc directory1] cp file1 file2
[username@linuxpc directory1] ls
file1
file2
Files can be deleted with the rm (remove) command:
[username@linuxpc directory1] rm file2
We can run similar commands to cp and rm entire directories. Note in these cases we need to use the -r flag, which stands for recursive. This means perform the command on the directory and all its contents:
[username@linuxpc directory1] cd ..
[username@linuxpc ~] cp -r directory1 directory2
[username@linuxpc ~] rm -r directory2
1.4.2. Creating a text file
We can launch programs from the command line. A common example of this will be to create text files. There exist a lot of text editors for this purpoes (e.g. vim, emacs, kate), here we’ll use gedit. Use gedit to create a new file called newfile.txt and save it to the home directory. Close gedit when you’re done.:
[username@linuxpc ~] gedit
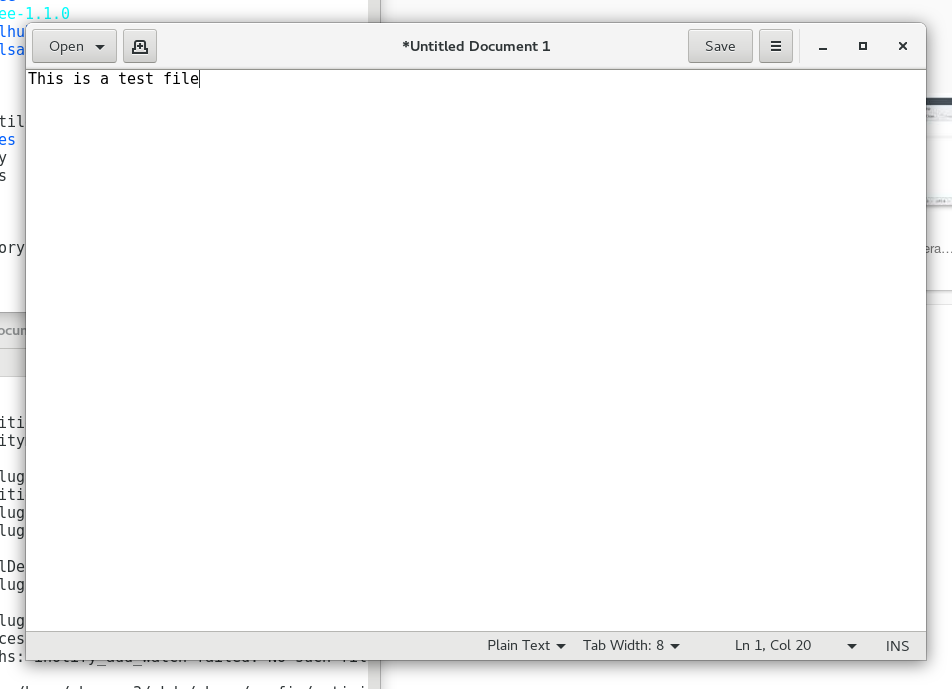
To edit newfile.txt in gedit, you can call gedit with the filename::
[username@linuxpc ~] gedit newfile.txt
1.4.3. Changing file permissions
Recall that you can use ls -l to view file permissions. Imagine we wanted to give other users permission to read our text file. For this we can use the command chmod (change mode).
To use chmod we need to specify three options relating to (i) what person or group, (ii) whether the permission should be added or removed, and (iii) which permission should be changed. These are encoded as:
| Who? | What? | Which? |
|---|---|---|
| u = owner | + add permission | r = read |
| g = group | - remove permission | w = write |
| o = others | x = execute | |
| a = all |
For example, to give other users permisson to read our file:
[username@linuxpc ~] chmod o+r newfile.txt
In this case o refers to others, + to add the specified mode, and r to read-access.
1.4.4. Exercise: ASCII art
Early computers and printers lacked the ability to render graphics, and were limited to text outputs. The result was the use of text characters to build images. For example:
_{v}_    (v)     ('>    ( )
 /-\    //-\\    /V\   // \\
(\_/)   (\_/)   <(_)   (\=/)
 ^ ^     ^ ^      ~~    ~ ~    By: Axel Poque aka apx
Here we’ll use the Linux terminal to follow in the footsteps of these computer art pioneers:
- Create a new directory in your home space (
~) namedascii_art/. - Open a new text file called
art.txt - Draw a (quick!) ASCII picture, and save it to the directory
ascii_art/ - Give read permission to all users to your file
You can display your image in the terminal with the command:
cat ascii_art/art.txt

  |\_/|
 / @ @ \
( > º < )
 `>>x<<´
 /  O  \
1.5. Running programs
The command line can be used to execute commands or scripts. You’ve already run a few commands from the command line (ls, pwd, gedit, chmod, cat), so you already know how to eecute programs
1.5.1. Simple programs
Some simple programs can be executed with a single word. What do the following programs do?:
[username@linuxpc ~] whoami
[username@linuxpc ~] fortune
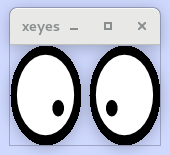
[username@linuxpc ~] xeyes
1.5.2. Programs with options
Lots of programs have options, which we can modify with --flags.
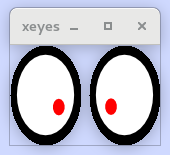
Let’s take the xeyes program as an example. By default, xeyes operates as follows:
[username@linuxpc ~] xeyes
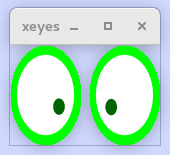
We can change the colour of the eyes using -fg (foreground colour) and choosing a colour:
[username@linuxpc ~] xeyes -fg green
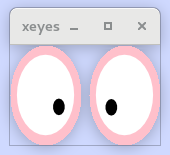
Similarly, with the option -outline we can choose an outline colour:
[username@linuxpc ~] xeyes -outline pink
If we wish, we can specify multiple options:
[username@linuxpc ~] xeyes -fg darkgreen -outline gren
1.5.3. Getting help
Flags are a very common way of specifying input options. But how do you know what flags exist?
There is a command called man (manual). We can use it to get help for most command line programs. For the example of xeyes:
[username@linuxpc ~] man xeyes
XEYES(1)                    General Commands Manual                   XEYES(1)

NAME
    xeyes - a follow the mouse X demo

SYNOPSIS
    xeyes [-option ...]

DESCRIPTION
    Xeyes watches what you do and reports to the Boss.

OPTIONS
    -fg foreground color
            choose a different color for the pupil of the eyes.

    -bg background color
            choose a different color for the background.

    -outline outline color
            choose a different color for the outline of the eyes.

    -center center color
            choose a different color for the center of the eyes.
...
1.5.4. Exercise
- Using
xeyesand the instructions given byman, can you produce a set of eyes that look like this?

- Using
man, can you work out how tolsonly directories? - What does
man mando?
1.6. Shortcuts and tricks
1.6.1. Wildcards
Often we will want to refer to multiple filenames or directories. We do this with the wildcard symbols * and ?. The ? a single character, and the * symbol refers or zero or more characters.
For example, we might want to list everything beginning with D in the home directory:
[username@linuxpc ~] ls -l D*
drwxr-xr-x  4 username username 4.0K Sep  7 11:32 Desktop
drwxr-xr-x 12 username username 4.0K Sep 12 11:35 Documents
drwxr-xr-x  9 username username  12K Sep 13 13:14 Downloads
We’ll return to using wildcard symbols later.
1.6.2. Auto complete
We can use the tab key to auto complete commmands in the terminal. For example, if we wanted to cd to the Documents directory we could start with:
[username@linuxpc ~] cd Doc
… hit tab, and as there are no other directories fitting that pattern, the field will autofill to Documents:
[username@linuxpc ~] cd Documents/
Where there is more than one possible program, directory, or files, the tab key will display possible options:
[username@linuxpc ~] cd Do
Documents/ Downloads/
Fill in more letters and press tab again to proceed.
You’ll find that use of the tab key to auto complete will speed up navigation around the command line substantially.
1.6.3. Get previous commands
You can use the up key to scroll through a command history. This will save you having to re-type out commands repeatedley. Once you find the command you’re looking for, you can edit it with the left and right keys. Give it a try!
1.7. Remote access
1.7.1. Within Linux
Note
These instructions are specific to the University of Edinburgh School of Geosciences, and are very unlikely to work elsewhere. If not working at The School of Geosciences you’ll need to replace the destination to connect to another PC.
One of the strengths of linux is that you can control computers remotely. We can do this using ssh. In The School of Geosciences we have two large servers that can cope with large jobs named burn and achray. To connect to these servers, use the following command:
[username@linuxpc ~] ssh burn
-----------------------------------------------------------------------------
Unauthorised access is a criminal offence under The Computer Misuse Act 1990.
            If you are not an authorised user, disconnect NOW.
-----------------------------------------------------------------------------
Last login: Thu Sep 13 16:11:17 2018
[username@burn ~]$
You’re now controlling a remote PC. To log out and return to the local machine, type logout:
[username@burn ~]$ logout
Connection to burn closed.
[username@linuxpc ~]$
If you want to use graphical programs, such as gedit or QGIS, when you ssh you’ll need to specify the option -X:
[username@linuxpc ~] ssh -X burn
You can test whether you have access to graphical windows (known as X11) by trying to open a graphical program (e.g. gedit, xeyes).
1.7.2. From Windows or Mac
This is more complicated, but you can connect to a remote Linux server from a Windows or Mac PC. Exactly how this works will depend on the remote server, but to make a start you’ll need access to a Linux terminal.
If you’re on a Mac, you’ll find the command line under Applications -> Utilities -> Terminal.
If you’re on Windows, you can also get a terminal window when connected to a remote PC, but you’ll need to download an ssh client. For example, `PuTTY’_
1.8. Summary
We learned how to use the following commands. There are many thousands of other commands in Linux which you’ll learn over time, but these are the main commands you’ll need to navigate and manipulate files on the command line.
echo: Print to the terminalpwd: Print working directory.ls: List contents of working directorycd: Change directorymkdir: Make directorymv: Movecp: Copyrm: Removechmod: Change file permissionsgedit: Create a text file in the gedit editorman: View manualssh: Connect to another PC